Earlier this week I was able to get my inbox to zero unread emails for the first time in literally years. This is only for my main personal, and main business email. I still have an email where I get promotional store offers, but that is primarily for store coupons and deals, so it’s not necessary for me to read all of them. It’s been a great feeling these past few days having my main inboxes under control. It allows me to focus completely on other tasks and work on building my business.
Email Management Tips
In today’s post I am going to share a few tips for how I deal with emails from Amazon. Depending on your settings, this can be a large volume of emails. The processes outlined here are simple to implement and can save you some time down the road. Let’s get started.
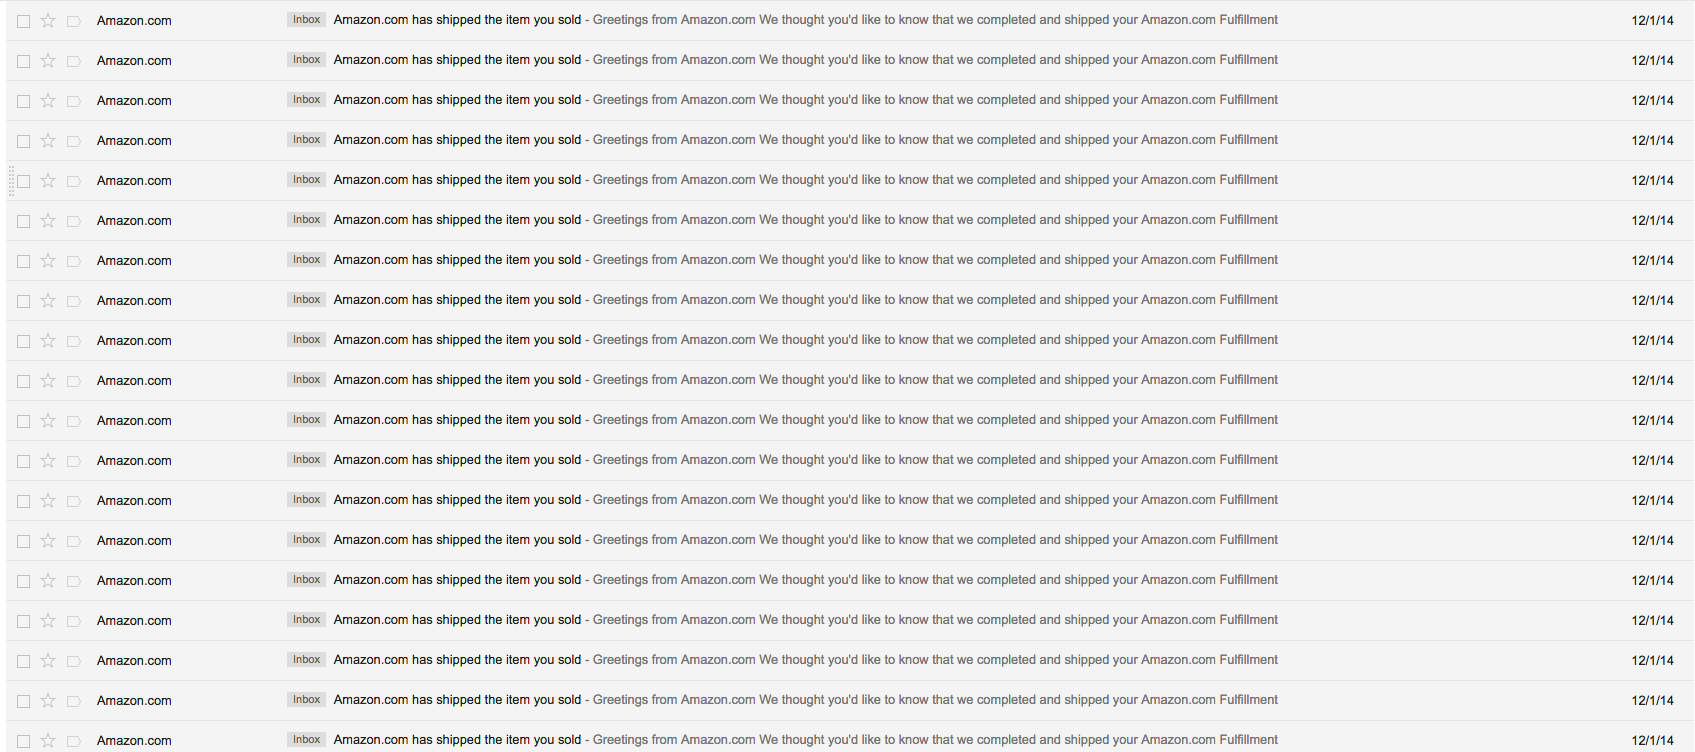
Turning off “Amazon.com has shipped the item you sold” notifications.
You might be thinking: What? I love getting those notifications! Well I love having things sell, but I am not crazy about getting 100+ of these emails every day. As they can really take over your inbox. I did a search and I have had these emails turned off since December 1st of 2014. As you can see the number on one day takes up more than the full screen:
When you first get started selling it can be exciting to have these emails on and it can be great for motivation. After you get more advanced though there are better ways to actually look through your sales. The main ways I do are through viewing my orders through my seller account, on the Amazon Seller App, or via my InventoryLab account. My favorite way is to review my sales in my InventoryLab account, as then I am able to see my ROI%, profit amount, and more all in one line. These emails from Amazon don’t show all of this info. It is essential to look at your sales and know what is selling consistently, but I prefer to do it in InventoryLab as I get all of the key stats on my sales instead of just knowing which item sold most recently.
Turning off “Notification of Open Listings Report availability” notifications
If you sign up for a service like InventoryLab, or any service that requires access to reports on a regular basis you are going to get these emails. These reports are essential for the services you use to get the data they need, but they come with the annoying side effect of an email every couple of hours. With these on, your inbox will start to look like this:
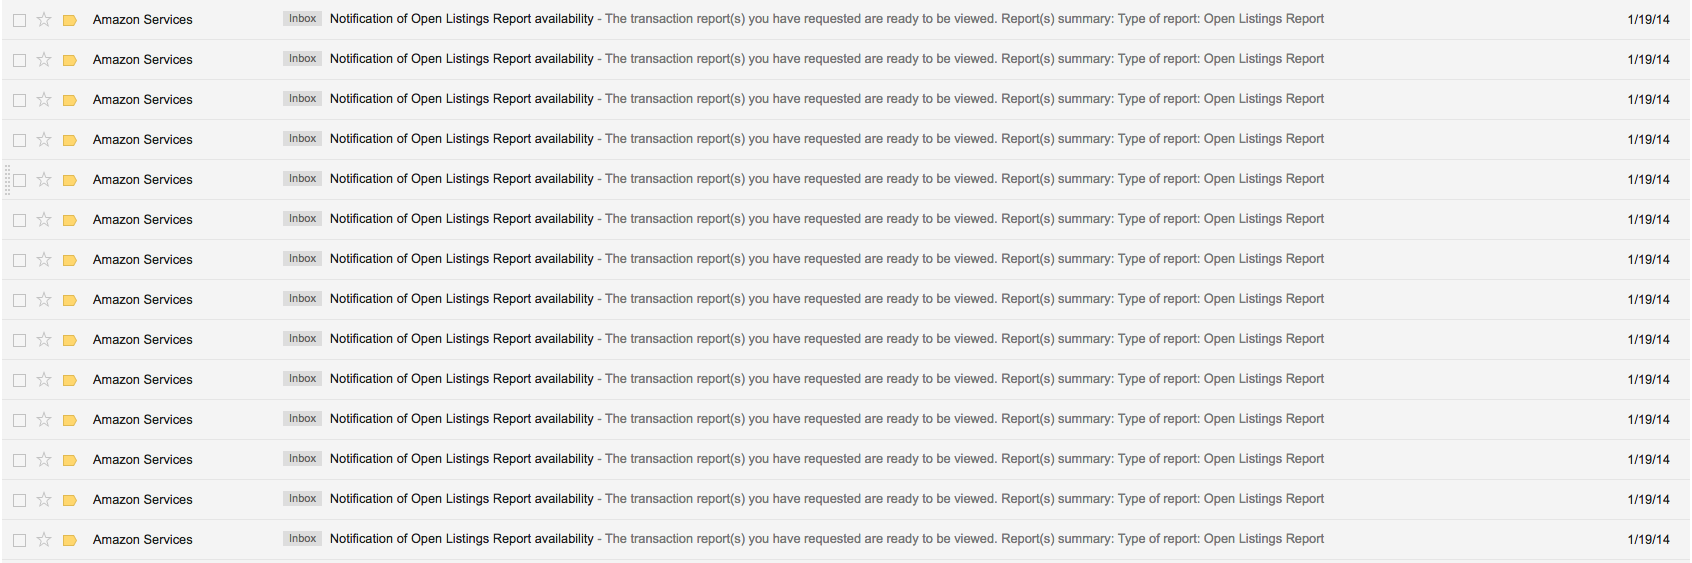
As you can see, you may receive 14 or more of these emails in a single day. They all say the same thing and really don’t add any value to your business. I have had them turned off since January 19th of 2014, and recommend that you do as well.
Now, if you want to edit your preferences for either of the above 2 forms of email, here’s how to do it.
- Login to your amazon seller account
- Scroll to the very bottom of the screen and click “Notification Preferences” under settings
- Adjust as desired
Here’s a look at my settings on this screen (click to enlarge):
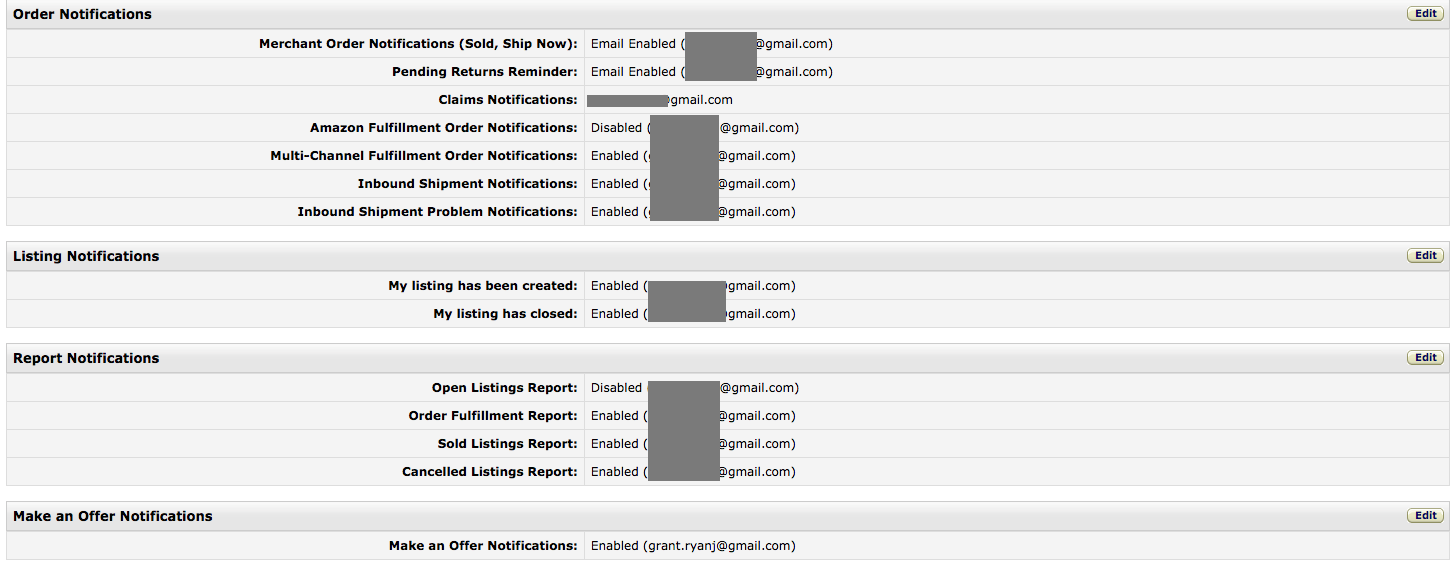
As you can see I have the Amazon Fulfillment Order notifications and the Open Listings Report notifications both turned off. This ensures that I don’t receive either of the aforementioned emails in this post. Doing this saves a lot of clutter in my inbox. Play around with these settings a bit and see if you can save yourself some unneeded emails.
One other quick tip in your notification preferences, is that in the top 3 sections you can have these emails sent to multiple email addresses. This can be helpful as you add team members if they need access to certain info that comes in these emails.
Filtering Out Refund Notifications
The 3rd and final email tip for today is to filter refund notifications directly to a separate folder. The reason for doing this is two fold. The first is that it can be frustrating to see these emails come through. Filtering them to a folder that skips the inbox ensures that a refund notification does not negatively impact your motivation. The second reason is that it can be helpful when going through your reimbursements. This folder will have all refunds, so it’s easy to go in this folder and make sure that all of these items were actually returned. So those 2 reasons coupled with the fact that it helps keep your inbox clean are my reasons for doing this. Here’s what your inbox could look like if you don’t do this (this is from the folder I have setup, but I would be looking at receiving several additional emails per day):

If you want to filter out these messages, you can create a filter within your email provider. I use gmail for this, so here’s the process for how to set these up:
- Find a refund notification email in your account
- Click the “more” option towards the top center of the screen
- Select “filter messages like these”
- Then input the email that these messages come from in the from field. For me it’s do-not-reply@amazon.com
- In the “has the words” section, input “Refund initiated for order” (Note: the reason for this is that occasionally Amazon will use the do not reply email to send notifications about inventory issues. It’s not that common, but those are usually important emails, so you have to makes sure only refunds are getting filtered out.)
- Click the “continue” button in the bottom right of the filter setup box
- Check the “Skip the Inbox (Archive it)” box
- Check the “
- Select “create filter”
That’s it. Now all of your emails will go to a separate folder based on the label you setup.
Overall the steps outlined in this post will only take a few minutes to setup. They do have the potential to save significant time and attention when it comes to managing your inbox. Email can be a big time suck and the 3 steps outlined above help me to make it less of one. Hopefully you find this post helpful. Do you have any tricks or tips to manage email from Amazon? Any questions on this post? Let me know in the comments below!